-
 Ultimate Version
-
 Configuration
&
Installation
in a nutshell -
 Demo
Demo
Movies -
 Miscellaneous
Installation and configuration settings (in a nutshell)
basically for a good functioning of DaL data Logging your Netduino need:
- The core firmware (if update is required)
- delete the old core Netduino firmware with "STDFUTester"
- flash the new core Netduino firmware with "DfuSeDemo", you can download the Tester and Demo files HERE
- The whole procedure howto update your Netduino core software can be found HERE
and the flash core firmware VideoDEMO - Flash the DaL firmware to the Netduino
- You can flash the DaL HEX firmware with "mfDeploy",
this is a tool who comes with Visual Basic Express 2012 flash firmware VideoDEMO - or.. You can, if available, flash the DaL source code with Visual Basic Express 2012, you can download VS2012 HERE
- Set the same IP and port number as under point 4 in file "NetduinoConfig.js" to let your web pages connect the Netduino
- You can change the data in file "NetduinoConfig.js" with a simple word processor
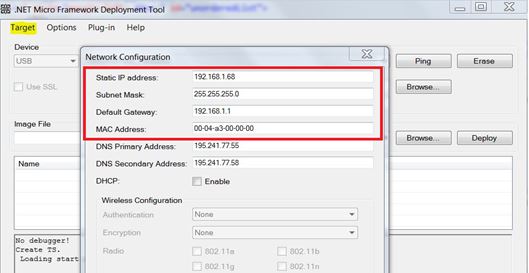
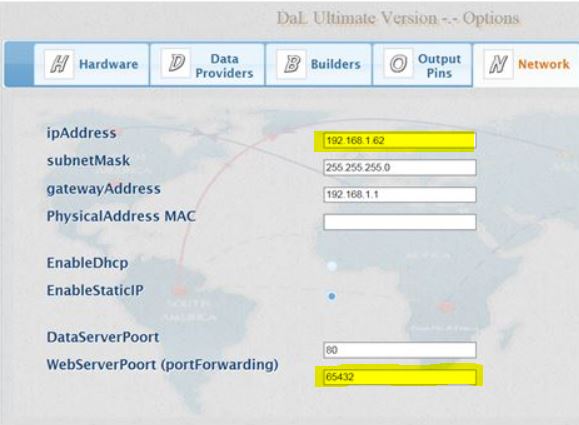
- Set the Network settings of the Netduino
- You can flash the Network settings with mfDeploy flash network settings VideoDEMO
- or.. You can fill in the network settings with the web browser tab "Network" and save the configuration as under point 5
- Make the startup Configuration with webPage "Pages/Options.html and make the data accessible for DaL on the Netduino
- You can upload the Configuration with webPage "Pages/Options.html" with tab "Save", but the Netduino must be accessible over your network (point 4 network)
- or.. You can save the Configuration settings in a text file "\SD\NetduinoConfig.ini" and save it on the Netduino sd-Card.
- or.. You can save the Configuration settings directly in the DaL source code, and flash it all
at together Copy paste configuratie VideoDEMO
So, the first thing to do is to flash the DaL firmware (HEX file) to your Netduino using Microsoft mfDeploy.
The next thing to do is, if the firmware is flashed, fill in your Network settings with mfDeploy and flash the Network data also to your Netduino.
You can skip the step with mfDeploy if you fill in the complete configuration with the webpage "Pages/Options.html" and save this configuration to file "\SD\NetduinoConfig.ini" on your Netduino sdCard.
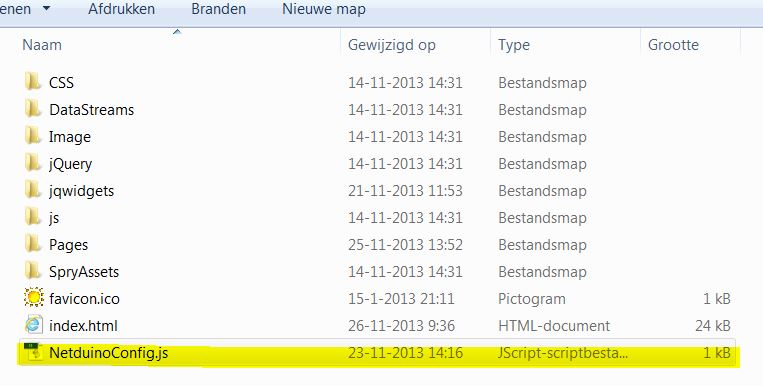
When you have done these steps successfully you'll have to fill in network configuration in the file "NetduinoConfig.js"
located in the root directory of your web pages. This is a very important step and CAN'T be skipped.!
Fill in your Network address an port number, this IP address and port number MUST be the same as the data from the webpage "Pages/Options.html", tab "Network" and/or mfDeploy Network settings!.
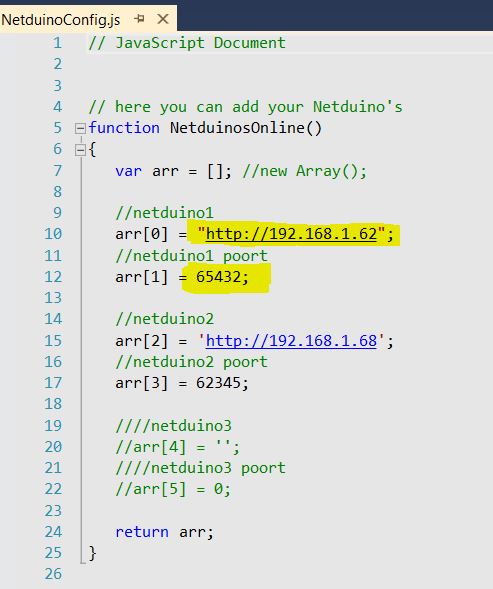
the webpage "Pages/Options.html", tab "Network", the data MUST be identical with the data in the file "NetduinoConfig.js"
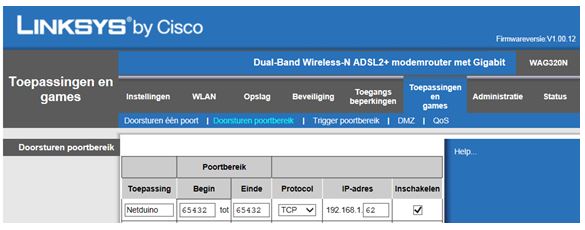
If you want to connenct with your Netduino over the internet (outside your home network) than you need to do port forwarding in your Router. Without port forwarding it is not possible to connect. The port number must be identical with the port number on the webpage "Pages/Options.html", tab "Network" You have to choose the protocol "TCP"
additional information.

Than it is possible to put the total configuration in the source code of the Netduino (hardcoded)
The configuration file "\SD\NetduinoConfig.ini" on your Netduino sd-Card is no longer required.
When you are ready with your configuration made with the web page "Pages/Options.html", you can copy the content from the configuration container tab "Save" and paste in in the source code string strStartUpData of the Netduino.
configuration container of the webpage tab "Save"
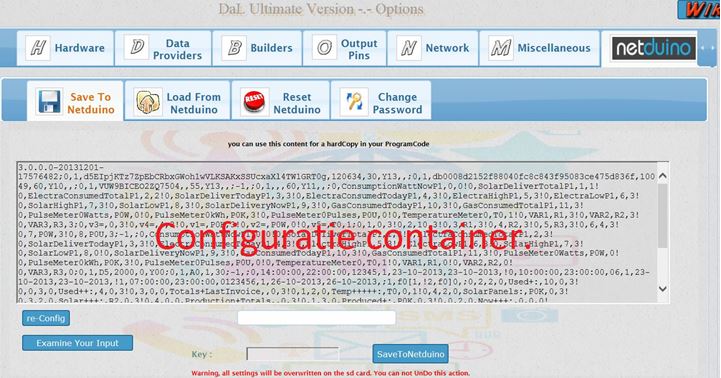
paste the configuration string in the Netduino sourcecode file: "ReadP1poortMain.vb" between the double quotes (string delimiters):

Instruction video Copy/Paste
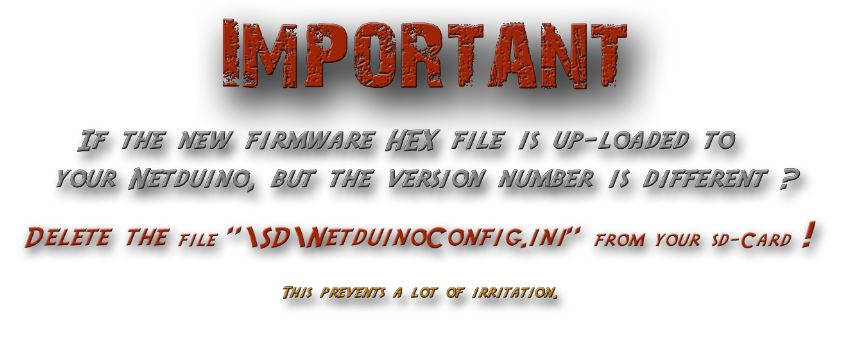
Note: if you update the Netduino from the webPage "Pages/Options.html" tab "Save" to the Netduino, the new configuration will be saved in the file "\SD\NetduinoConfig.ini" on your sd-Card of your Netduino.
Every time the Netduino startup (reset or firmware update) the Netduino will read the configuration out of the file "\SD\NetduinoConfig.ini" and NOT the hardcoded startup string out of the program.
If you do not want to read the configuration file DELETE "\SD\NetduinoConfig.ini" from your sd-Card.
With the demonstration videos we assume the demo IP address is "192.168.1.62" , the web server port "65432" en port forwarding in the router is set.
(of course, every valid IP address and port number is possible)
Instruction video Web Commands
If you want to connect with your Netduino from outside your own Network, you'll have to use the IP address from your provider instead of your local IP.
If for some reason, you do not know your IP address, you can find it out with WhoIs from your local network.
Example: your IP address is " 81.176.9.117 ", type in the web browser " http://81.176.9.117:65432/ " + a DaL WebCommand.
Valid web commands are:
- Now
- Delete <-> [IP]/Delete: [Path\FileName] delete file
- Directory
- Reboot
- Freemem
- Timers
- SaveMemory
- LoadMemory
- Telegram
- BackLight <-> [IP]/BackLight:[ID]:[OFF / ON] = turns the backlight of display [ID] OFF or ON
- PulseMeter <-> [IP]Pulsemeter:[ID]:[Value] change the value of the pulsemeter wattage
- GasToday <-> [IP]GasToday:[Value] change the value of GasToday
- ElectraToday <-> [IP]GasToday:[Value] change the value of ElectraToday
- SolarToday <->[IP]GasToday:[Value] change the value of SolarToday
- irLearnMode <->[IP]irLearnMode: [ON / OFF]
HowTo Copy-Paste the DaL configuration into the netduino source code (hardcoded)
HowTo flash the DaL datalogging firmware to the Netduino.
HowTo change your Netduino Network settings with mfDeploy.
HowTo flash the core Netduino software to the Netduino
my used hardware connected to the Netduino controlled by DaL data logging software
Demo critical error, pulsing LED
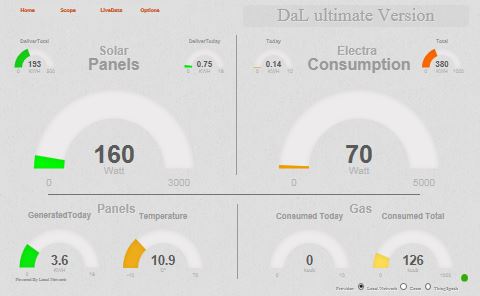
If you are using the DaL Dashboard and you have also connect the smart meter P1Port to the Netduino than it is possible to extract automatic the values
"ElectraConsumedTotal", "GasConsumedTotal" and "SolarDeliverTotal" on the dashboard.
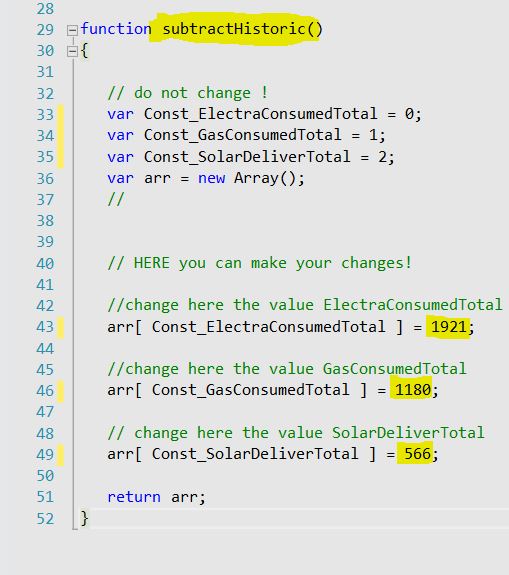
For example, this can be used to set the totals to zero after receiving the electricity bill from your energy company. You can modify the data in the file "NetduinoConfig.js" function 'subtractHistoric()' of your webpage root directory with a simple text editor.
The data in "NetduinoConfig.js" will extract from the new data "ElectraConsumedTotal", "GasConsumedTotal" en "SolarDeliverTotal" of your smart meter p1 port meter.
Example: "ElectraConsumedTotal" from your smart meter = 3921
arr[ Const_ElectraConsumedTotal ] = 1921 ( = ElectraConsumedTotal )
ElectraConsumedTotal - arr[ Const_ElectraConsumedTotal ] = 2000 will be displayed on your dashboard.
Error messages when reading the configuration string (strStartupData) when DaL starts.
This will and should not occur but ... IF for any reason whatsoever (eg manual input) an error is in the boot string, then the Netduino let know this with an error code. The memory of the netduino is too small to program all descriptions.
Error message in the immediate/ mfDeploy window

You can find this error also in the ERROR LOG on your sd card (if present).

if the netduino detects an error, the blue LED on the Netduino will begin to pulse, slowly on, slowly off.
Because of the critical error, the Netduino will not proceed until a new string is present.
Demo of pulsing LED VIDEO DEMO
In the web OPTIONS.HTML which the string is created in, in function ButtonSaveClicked all the error messages shown there. For example, "IF a ERROR OCCURS, Here is the error number: 1" something wrong with XivelyStream,
IF a ERROR OCCURS, Here is the errorNumber: 2 PVOutputStream etc..
zo is error code 9 in de webpage 'Pages/Options.html' OpenEnergy Field & Content:

With Error Code 0 is an configuration string loaded from a previous compilation, these are not interchangeable. Make sure that the configuration string is compatible and the version numbers of the program and the DaL Options.html page are the same.
Other error codes are:
- XivelyStreamGridDiv
- PVOutputStreamDiv
- ThingSpeakstreamDiv
- OpenEnergystreamDiv
- sdCardstreamDiv
- XivelyFieldContentGridDiv
- PVOutputFieldContentGridDiv
- ThingSpeakFieldContentGridDiv
- OpenEnergyFieldContentGridDiv
- sdCardFieldContentGridDiv
- soPulseMeterGridDiv
- TemperatureMeterGridDiv
- IC74HC595GridDiv
- TimerGridDiv
- NewComparisonGridDiv
- LCD_DisplayTextContentDiv
- LCD_DisplayGraphicContentDiv
- LCD_DisplayHardwareDiv
- miscellaneous
- WebCommandGridDiv
- PCF8574GridDiv
- MCP23017icGridDiv
- EMPTY - NOT IN USE
- SevenSegmentsHardwareDiv
- SevenSegmentsContentDiv
- P1Poort
- varBuilderGridDiv
- ServoContentDiv
- PinsGridDiv
- infraRed navigation codes
- Network Page
- Password

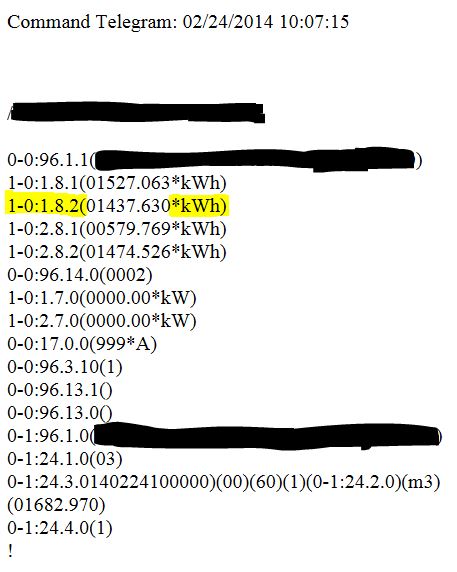
It is possible to use the Prefix and Postfix (search delimiters) from your smart meter as a standard into your web page. Change this in your personal "netduinoconfig.js" file in the root directory of your web pages.
NOTE: use the chararter '&' for a LINEFEED! (new line)
example of a telegram. [ip:port/TELEGRAM]
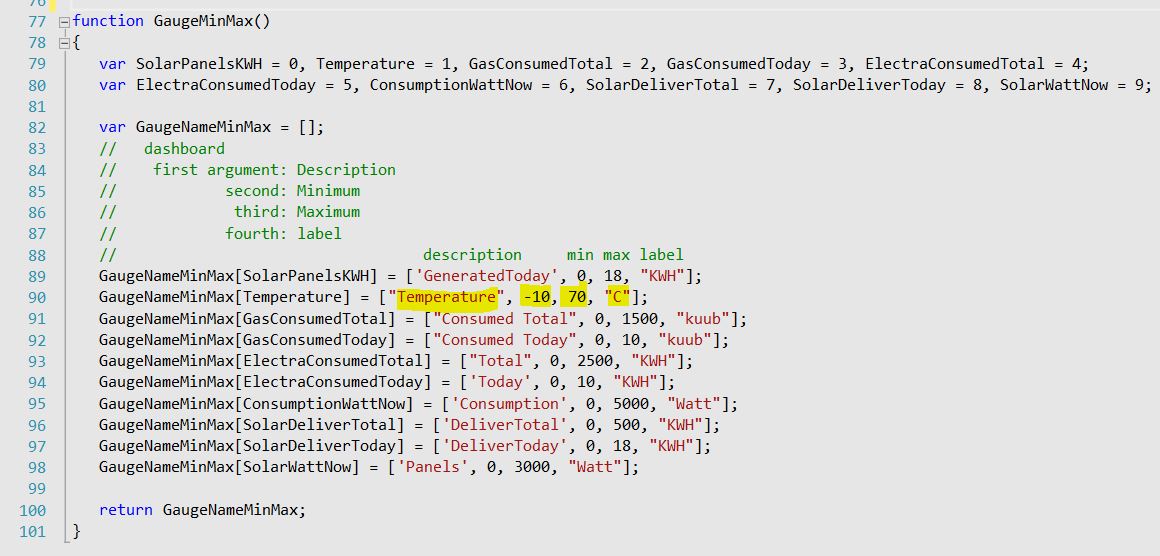
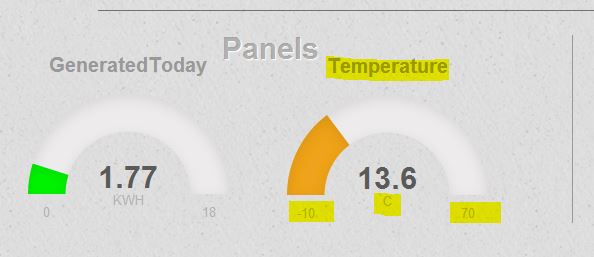
In the 'GaugeMinMax ()' function in your personal file 'netduinoconfig.js' it is possible to set Gauge names, labels as well as the minimum and maximum values of the dashboard Gauges